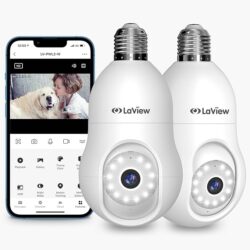
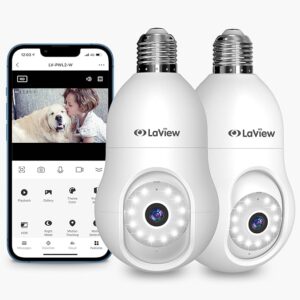
LaView 4MP Bulb Security Camera Review
The LaView 4MP Bulb Security Camera offers a seamless blend of lighting and surveillance, making it an excellent choice for enhancing home security. Designed to fit into a standard E27 light bulb socket, this device simplifies installation and integrates effortlessly into your existing lighting fixtures.
Table of Contents
ToggleKey Features:
- High-Definition Imaging: With a 4MP (2560x1440P) resolution and 12× digital zoom, the camera delivers clear and detailed visuals, surpassing traditional 1080p cameras. This ensures that both daytime and nighttime footage is sharp and reliable.
- Advanced Night Vision: Equipped with color, smart, and infrared night vision modes, the camera maintains clear monitoring up to 30 feet, even in low-light or complete darkness. This feature provides comprehensive surveillance around the clock.
- 360° Panoramic View: The camera’s 360-degree coverage minimizes blind spots, allowing for extensive area monitoring. This wide field of view is particularly beneficial for large spaces.
- Motion Detection and Tracking: The device includes motion detection and tracking capabilities, automatically following moving objects within a 355° range and up to 17 feet. Users can adjust sensitivity settings to suit their specific needs.
- Two-Way Audio and Alarm Siren: The built-in microphone and speaker facilitate real-time communication, enabling users to interact with visitors or deter intruders. Additionally, an audible alarm can be set to activate upon motion detection, enhancing security measures.
- Smart Home Integration: Compatible with Amazon Alexa, the camera integrates into smart home ecosystems, allowing for voice-controlled operation and seamless interaction with other smart devices.
Installation and Connectivity:
Installing the LaView Bulb Security Camera is straightforward. Simply screw it into a standard E27 bulb base (110V~240V). After installation, download the LaView app on your smartphone to connect the camera to your 2.4GHz Wi-Fi network. Please note that 5GHz Wi-Fi is not supported.
Storage Options:
The camera supports both local and cloud storage, providing flexibility in how footage is stored and accessed. Users can choose the option that best fits their security and privacy preferences.
The LaView 4MP Bulb Security Camera combines high-quality surveillance features with the convenience of a light bulb, offering an innovative solution for home security. Its easy installation, advanced imaging capabilities, and smart home compatibility make it a valuable addition to any security system.
Click here to get the LaView 4Mp Bulb Security Camera
LaView bulb camera review – see what other customers have said
The LaView 4MP Bulb Security Camera has garnered a range of feedback from users on Amazon. Here are some insights based on customer reviews:
Positive Feedback:
- Clear Image Quality: Many users commend the camera for its sharp and clear visuals, both during the day and at night. The 4MP resolution and color night vision are highlighted as significant advantages.
- Ease of Installation: Customers appreciate the straightforward setup process, noting that the camera can be easily installed into a standard E27 light bulb socket without the need for additional wiring.
- Motion Detection and Tracking: The motion detection feature is frequently praised for its responsiveness and accuracy. Users find the motion-tracking alerts beneficial for real-time monitoring.
Areas for Improvement:
- Wi-Fi Connectivity: Some users mention challenges with Wi-Fi connectivity, particularly noting that the camera operates exclusively on a 2.4GHz network and does not support 5GHz Wi-Fi.
- App Functionality: A few customers express concerns about the LaView app’s user interface, suggesting that it could be more intuitive and user-friendly.
- Audio Quality: While the two-way audio feature is appreciated, some users report that the sound quality could be enhanced for clearer communication.
Overall, the LaView 4MP Bulb Security Camera is recognized for its innovative design and effective surveillance capabilities. Prospective buyers are encouraged to consider these user experiences to determine if the camera aligns with their specific security needs.
How to Install the LaView 4MP Bulb Security Camera: A Step-by-Step Guide
Installing the LaView 4MP Bulb Security Camera is a straightforward process, designed for ease and convenience. Follow this step-by-step guide to get your new security camera set up and functioning in no time.
What You’ll Need:
- LaView 4MP Bulb Security Camera
- Wi-Fi connection (2.4GHz network)
- Smartphone with the LaView app installed
- Standard E26 light socket
- Screwdriver (if required for your socket installation)
Step 1: Prepare the Installation Area
- Choose the Right Location:
Select a light socket that provides a clear, unobstructed view of the area you want to monitor. Ensure it’s within range of your Wi-Fi network for reliable connectivity. - Turn Off Power:
For safety, switch off the power supply to the light socket where you’ll install the camera. - Remove the Existing Bulb:
Unscrew the current bulb from the socket and set it aside.
Step 2: Install the LaView Bulb Security Camera
- Screw in the Camera:
Align the camera’s base with the light socket and screw it in gently until secure. Avoid over-tightening. - Adjust the Camera Angle:
Most LaView bulb cameras have adjustable bases. Rotate the camera to point toward your desired monitoring area. - Power On the Camera:
Turn the power back on. The camera’s indicator light should activate, signaling it’s ready to pair.
Step 3: Connect the Camera to Wi-Fi
- Download the LaView App:
Install the LaView app from the App Store or Google Play on your smartphone. - Create an Account or Log In:
Open the app and sign up for a new account, or log in if you already have one. - Add the Camera:
- Tap the “+” or “Add Device” option in the app.
- Follow the on-screen instructions to scan the QR code on the camera or input its unique ID.
- Connect to Wi-Fi:
- Ensure your phone is connected to a 2.4GHz Wi-Fi network (the camera does not support 5GHz).
- Enter your Wi-Fi password when prompted.
- The camera should connect within a few moments. You’ll receive a confirmation in the app.
Step 4: Configure the Camera Settings
- Customize View Settings:
Adjust resolution, field of view, and motion detection settings through the app. - Set Up Alerts:
Enable push notifications to receive alerts when motion is detected. - Test the Camera:
Verify the live feed on your smartphone to ensure the camera is capturing the intended area.
Step 5: Final Adjustments
- Secure the Installation:
If necessary, use the included mounting accessories to stabilize the camera further. - Test Night Vision:
Check the infrared night vision feature to ensure clear recording in low-light conditions. - Save Recordings:
Insert an SD card (if supported) or configure cloud storage for recording footage.
Maintenance Tips
- Regular Updates:
Keep the firmware and app updated for the latest features and security enhancements. - Clean the Lens:
Wipe the camera lens periodically to ensure clear video quality. - Check Wi-Fi Signal:
Ensure the camera remains within range of your router for uninterrupted functionality.
By following these simple steps, your LaView 4MP Bulb Security Camera will be up and running, providing you with enhanced home security. If you encounter any issues, consult the user manual or contact LaView’s customer support for assistance.
How to Insert an SD Card into Your LaView Light Bulb Camera
Adding an SD card to your LaView Light Bulb Camera allows you to store video recordings locally for easy playback. Follow these simple steps to install an SD card correctly.
What You’ll Need:
- LaView Light Bulb Security Camera
- Micro SD Card (up to 128GB, Class 10 or higher recommended)
- Smartphone with the LaView app (optional for setup confirmation)
- A small tool like a screwdriver (if required for removal or adjustments)
Step 1: Power Off the Camera
For safety and to avoid potential data loss, turn off the power to the light socket before inserting the SD card.
Step 2: Remove the Camera from the Socket
- Unscrew the Camera: Gently rotate the LaView camera counterclockwise to remove it from the light socket.
- Handle With Care: Place the camera on a clean, soft surface to avoid scratches.
Step 3: Locate the SD Card Slot
- Find the Slot: The micro SD card slot is typically located near the camera lens or at the base of the device.
- Access the Slot: You may need to remove a small cover or flap to reveal the slot. If so, use your fingernail or a small tool to carefully lift it open.
Step 4: Insert the SD Card
- Position the Card Correctly:
- Hold the micro SD card with the metal contacts facing downward.
- Align the card with the slot.
- Insert the Card Gently:
- Push the card into the slot until you hear a slight “click,” indicating it’s securely in place.
- Avoid forcing it in; if it doesn’t fit, recheck the orientation.
Step 5: Reattach the Camera and Power On
- Screw the Camera Back In: Carefully screw the LaView camera back into the light socket.
- Turn the Power On: Restore power to the socket. The camera will power on and initialize.
Step 6: Format the SD Card via the LaView App
- Open the LaView App: Connect to your camera through the app.
- Access Storage Settings:
- Go to “Settings” > “Storage” or “SD Card Management.”
- Select Format SD Card to prepare it for recording.
- Confirm: Once formatted, the app will display the available storage space.
Step 7: Verify Recording
- Check the live feed in the app to ensure the camera is functioning.
- Enable recording settings under motion detection or continuous recording, based on your preference.
Tips for SD Card Use:
- Use a high-quality micro SD card (Class 10 or UHS-1) for smooth performance.
- Regularly back up recordings to a computer or cloud storage to avoid losing important footage.
- Monitor storage usage and format the card periodically to keep it working optimally.
Troubleshooting:
- If the SD card isn’t detected, try re-inserting it or check compatibility.
- Ensure the card is properly formatted using the LaView app.
- Restart the camera if it doesn’t recognize the card.
By following these simple steps, your LaView Bulb Camera will be ready to store recordings locally, giving you reliable and secure access to video footage. Enjoy enhanced peace of mind and security!

